
What is the first thing that comes to mind when you hear the word “computer hacker”? If it’s a hooded/gloved/masked suspicious-looking figure in a dark room staring at multiple computer screens of scrolling green numbers with the remains of various caffeinated beverages scattered about, then you’re probably not that far off. And what behavior is usually associated with hackers?: Stealing information or gaining unauthorized access to data and accounts. These kinds of stereotypes are common knowledge, but have you ever wondered what exactly that green cryptic code is? Well that, my fellow nerd, is the command line in all its glory.
What is less well-known is why hackers use the command line (CL). It is rather simple, actually: they are accessing, altering, and moving around massive amounts of data, and the CL is the most efficient, and sometimes only, way to do so. Whether you are looking to make new directories like I touched on in my last post, you want to move and unzip a downloaded data file to a new directory, or you want to quickly run a python script, the CL can help you do so without using your mouse once. In this post, I will introduce and get you setup with the CL and teach you some basic CL commands which will have you at hacker-status in no time.
***When referring to what you should input into the terminal in-text, I will use this style text. Also, when I am writing a generic file name/directory, but want you to fill in your own, I will write the name in square brackets like this: [yourfilename].***
The command line, aka the command line interface, is a simple way for a user to communicate with the computer. For example, by default when you open your CL, you will be in a “home” directory, likely in the current user’s folder. You can find out which directory you are in by typing pwd, which means print working directory, and will print off something like this: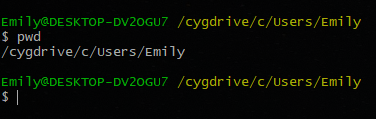
However, you likely want to change your directory so that you can work where your files are. You can do this by typing cd [newdirectory], which means change directory, and will look like this: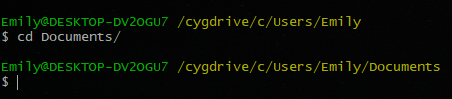
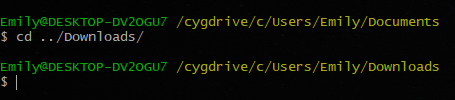
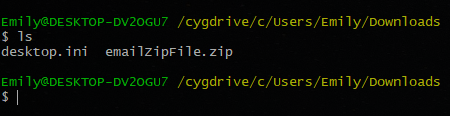
As you can see, the new path name is added in yellow above the new line. To show you the power of the CL, let me show you quickly how to move a newly downloaded .zip file to another directory and unzip its contents. So I just downloaded a file from an email, which is currently in my “Downloads” folder. Let’s change to our “Downloads” directory from our current directory by entering cd ../Downloads, where the “..” sends us back one directory:
We can then list all files that are in our current Downloads directory by typing ls:
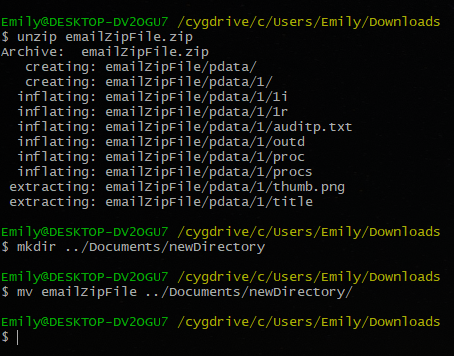
Next, we want to unzip this file, which we can easily do from the CL: unzip emailZipFile.zip, make a new directory in the Documents directory, mkdir ../Documents/newDirectory , and move the unzipped file to newDirectory, mv -r emailZipFile:
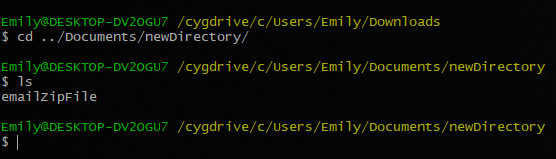
Lastly, if we move to newDirectory and then list all files inside of it, we will see that we successfully have unzipped our .zip file and moved it to our new directory:
I hope that you are starting to see the power of the CL at this point, but to be fair, we should probably compare the CL interface (CLI) to the user-friendly graphical user interface (GUI) which anyone born after 1990 likely grew up with. A GUI is exactly what it sounds like. Just like the CLI, it interfaces with the computer to give it directions, however instead of having to type all of your commands in like you do for the CLI, a GUI allows you to point and click on menus and files, as well as drag-and-drop, graphically.
In my opinion, it is rather unfortunate that we learn how to use a computer from the “top-down” like this. Although GUI software is great for the part-time user, anyone who plans on spending time on their computer working with data (be it images, text files, or videos), it would serve you much better to start from the bottom and work your way up to GUIs. Further, all those bells and whistles that GUIs have (yes, even your file search window is a GUI) eat up precious computer memory, and thus will slow you down. So if you are interested in integrating the CL into your daily workflow, welcome to the darkside, you are far from alone!
If you are a Mac user, congratulations! You already have one of the best CLs built-in. Just press command+space together, and then type in “terminal” and press enter. Walla! Your own perfect CL ready to go. This feature of Macs almost makes me want to be a full-time Mac user.
Unfortunately Windows users, we don’t have it so good. If you press the windows key and then type “command prompt” and hit enter, you will see something like this sad corpse of a CL:

Although you can function in this CL, it is not nearly as powerful as Mac’s terminal or other unix-like operating systems built-in CLs. Thankfully, we can get our hands on a better CL (otherwise called “shell”) by installing a terminal emulator. I currently like Cygwin
because it is easy to install and update and does a really good job at making you feel like you are in a unix-like environment. Just follow the download and install directions on their website.
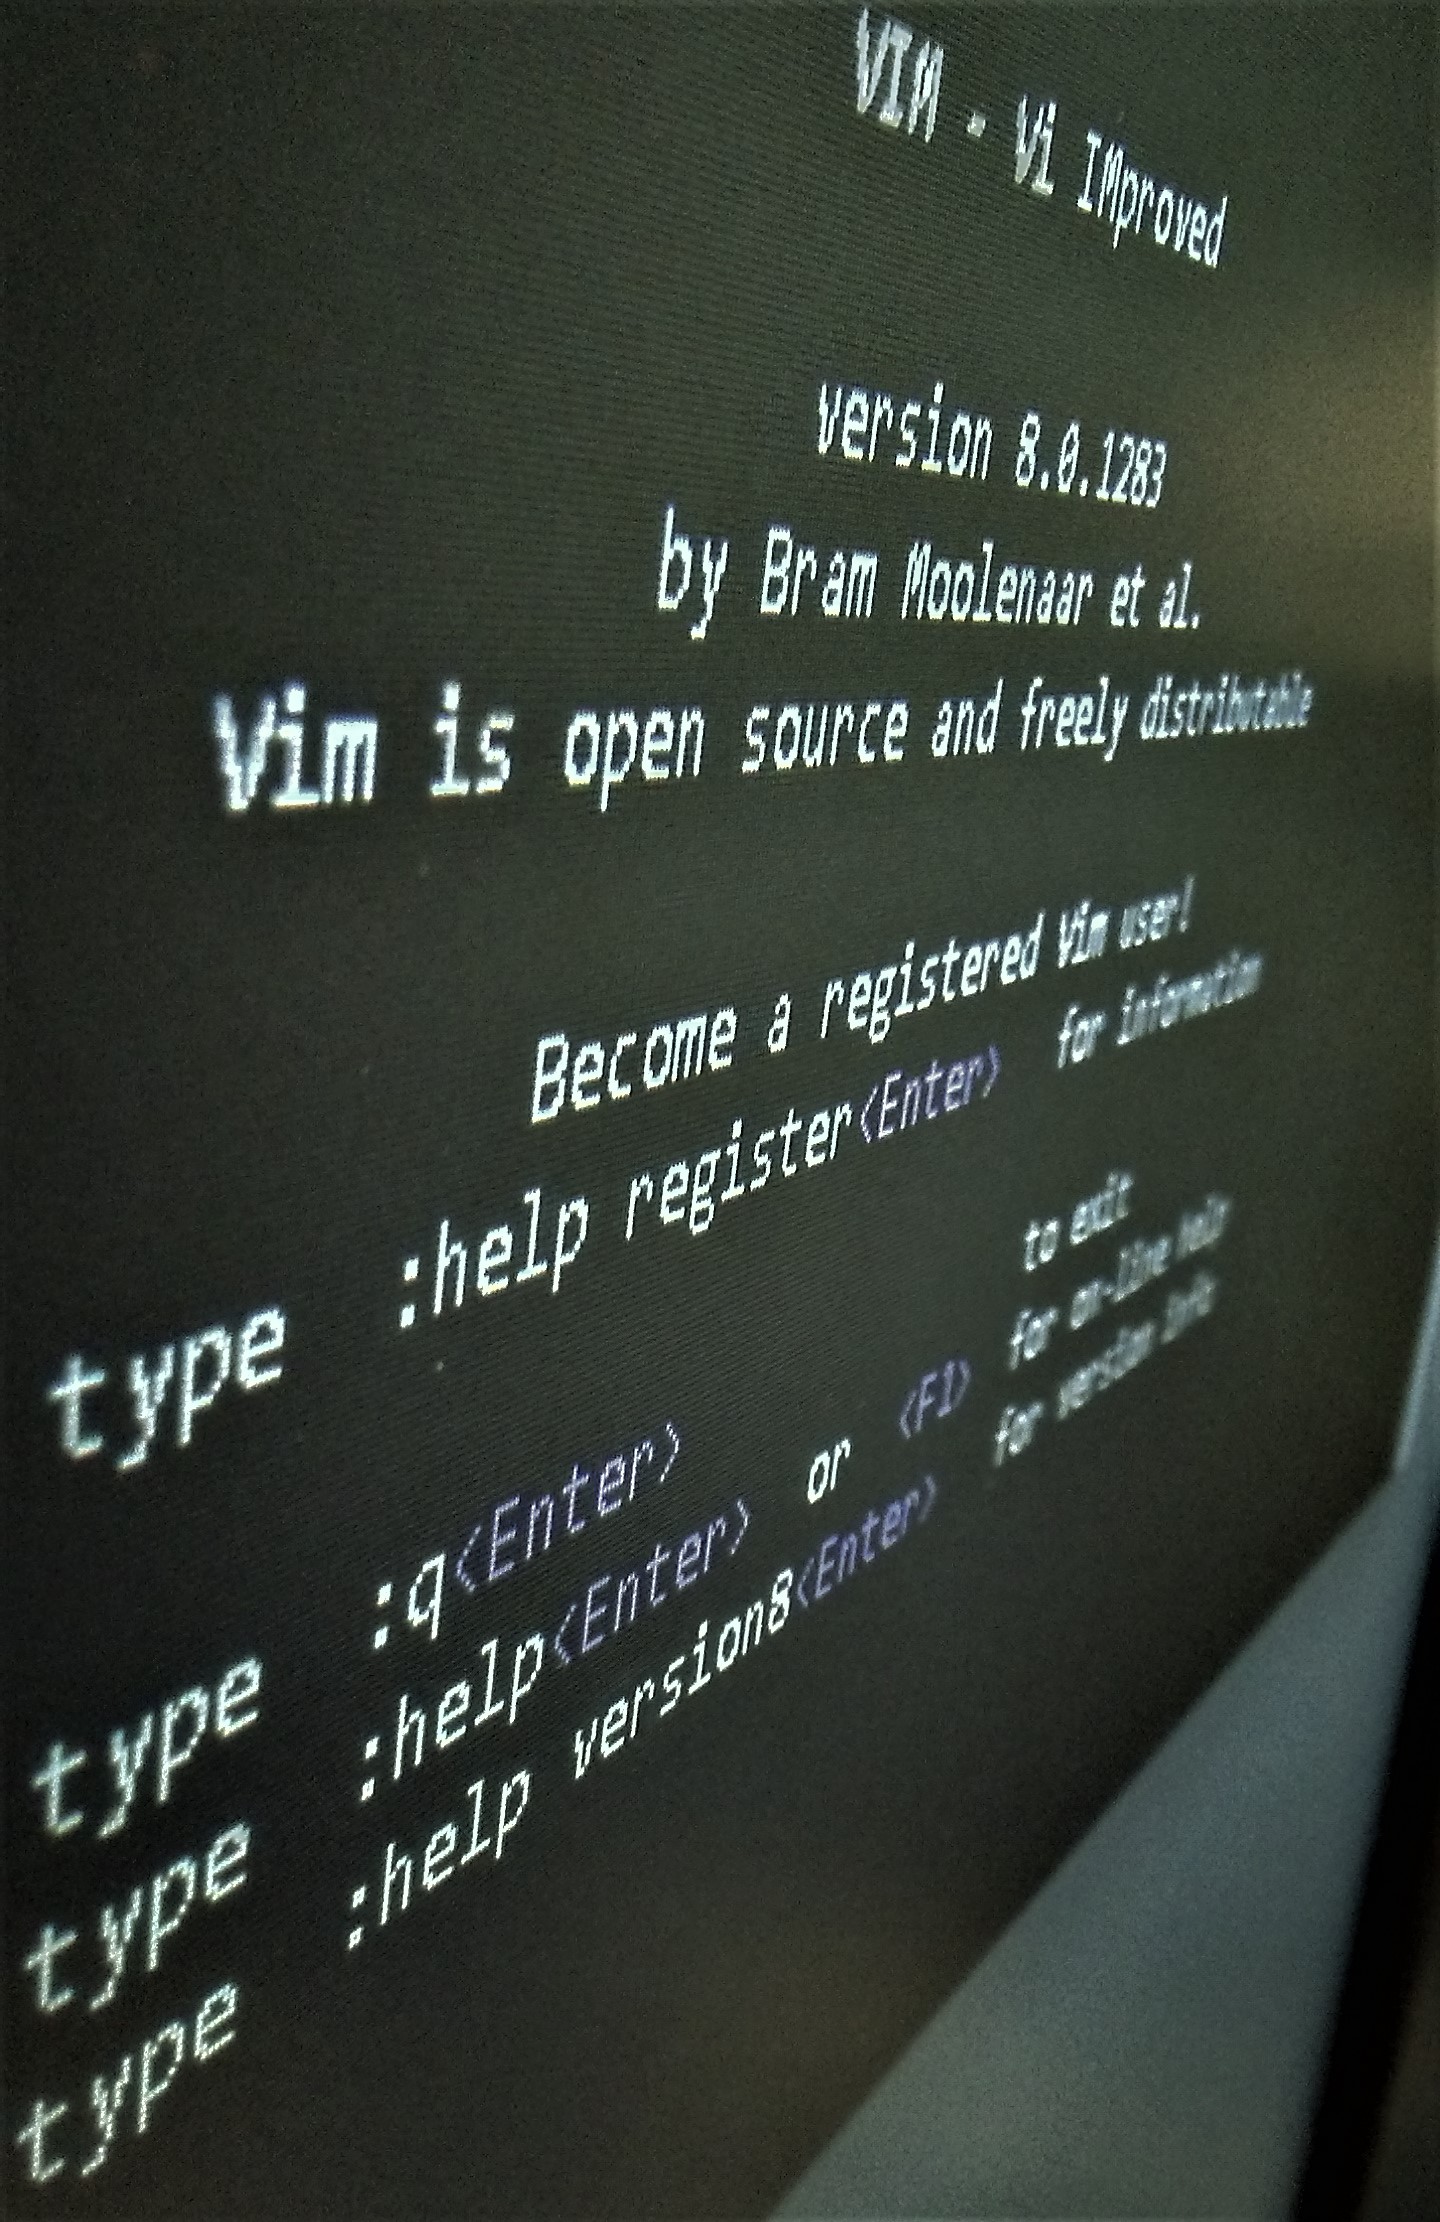
Probably the most powerful aspect of the command line is being able to use the text editor called “Vim”, which stands for “Vi improved”, and is a new version of the original Vi text editor. If you want to create any kind of code, you need to use a text editor to do so. Whether this is working in Jupyter notebook and working interactively with the programming language, or if you are using basic notepad, or even a GUI word-processor like Microsoft Word, you are essentially creating lines of text which you are editing: hence “text editor”.
If you haven’t realized by now, however, I prefer to stay away from GUIs as they slow down your workflow and computer speed. Vim is a completely customizable text editor which you can access directly from your CLI without the need for a mouse. Further, when working in Vim you will be able to edit and navigate through large blocks of text in ways not afforded by a GUI text-editor.
Vim tends to even have a cult-like following among the efficiency-driven programmers of the world, and those against using Vim tend to be quite as passionate. One of the main arguments for using Vim (and the CL), is that you can return to the home position on your keyboard where the fingers of your right hand fall onto the “hjkl” keys. These four keys are then your movement keys to move around the document, where similar to the arrow keys, “h” is left, “j” is up, “k” is down, and “l” is right.
This is one of the biggest arguments against Vim as well, as Vi was crafted originally for a keyboard which lacked the arrow keys, and thus, now that we have arrow keys, we should use them. If you are familiar with computer gaming, then you are already familiar with the use of keys for movement, and most games utilize the “aswd” keys to move your character around the map, so the reasoning for favoring Vim is not as far-fetched as the Vim-haters make it seem.
But enough talking about Vim, lets use it! I’ll get Mac and Windows users up and running and then explain how to maneuver through vim.
Yet again you Mac users picked the long straw and don’t need to do any install to get into Vim. However, good luck keeping up with PC gaming! Anyways, to start working in Vim on your Mac, go to your terminal and type vim newFile.txt. This will open the Vim text editor directly in the terminal.
To exit this file, hit escape, and then type :q! and press enter.
Alrighty Windows users, time to do a little updating of the Cygwin terminal so that we can use vim. What you need to do is go to the “setup-x86_64” .exe file from when you downloaded and installed the Cygwin terminal (it should be in your Downloads directory still – don’t delete this because you will want it in the future to update your terminal).
Launch the setup file and choose all the settings like you did for the install, and then when it brings you to the Select Packages window, change the view to Not Installed, and then type vim into the search. Select the package name “vim: Vi Improved – enhanced vi editor” by clicking on “Skip” until in turns to the newest package version.
After that update is done, open up a new Cygwin terminal and type vim newFile.txt. This will open the Vim text editor directly in the terminal.
To exit this file, hit escape, and then type :q! and press enter. Now we should all be on the same page and can go about making and editing a text file.
Now that you are up and running in your new hacker environment, it’s time to test out some of its other capabilities to get you familiar with communicating with the computer in this new way. We will be using an inaugural “hello world” python program to test out running python scripts from the CL.
First we need to create a python script. Why don’t we use our new right-hand man, Vim? Create and open a new python file from the terminal by typing vim helloWorld.py. The “.py” extension is what we use for python files.
The hardest thing to get accustomed to in vim is the idea of “modes”. What this means is that each key can do different things depending on which mode you are in. You can switch between modes by hitting escape and then typing “i” for “insert mode” to start typing text or “v” for “visual mode” to be able to select blocks of text. If you just hit escape and don’t type one of these commands, then you are in “normal mode”, which allows you to use the “hjkl” keys to move around the document.
There are lots of commands you can use in vim by typing “:” followed by a command in normal mode, and you will see what you type at the bottom of the screen in vim’s command line. For instance, if you type :help and enter, you will get a help menu. Type :q and enter to exit this help menu.
Using our new vim skills, change to insert mode and then type print “Hello World!”. This will be our python program that we will run in the terminal. To save this file, you need to change to normal mode, and then type :w and enter, followed by :q and enter (these correspond to “write” and “quit” respectively).
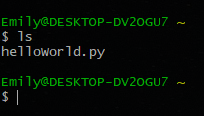
If you then enter ls into the terminal, you should see a print out of the new file you made:
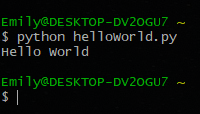
The last thing we need to do is run this python script from the CL. To do so, all you need to do is enter python helloWorld.py (if you do not have python installed, please see my previous post). You should see the following:
Now you are fully-equipped to use the CL and Vim to be the most productive hacker you know! In upcoming posts, I will be talking about all of the cool things you can do with vim, python, and the CL so stay tuned for more!
All thoughts and opinions are my own and do not reflect those of my institution.